
So here’s the thing: to stand out as a 3DX artist, it helps to have some assets that are not available in the public marketplace. It helps even more if those assets are a staple of your work. In other words: genitalia. People will spend more time looking at your characters’ gens than almost everything else combined, so what better thing to stand out with?
Unfortunately, creating your own custom gens to use in your renders isn’t easy. Given how female gens are even a step above male gens in terms of difficulty to apply, let’s start with cocks, and assume a simple workflow that goes like this: modeling -> texturing -> rigging -> implementation -> postwork. Let’s go through these phases step by step and give you a good overview of what the market has available.
Keep in mind, this tutorial is more of an orientation. You will have to research the software I recommend yourself before you make an informed decision. This is just to help set you on the path.
Modeling
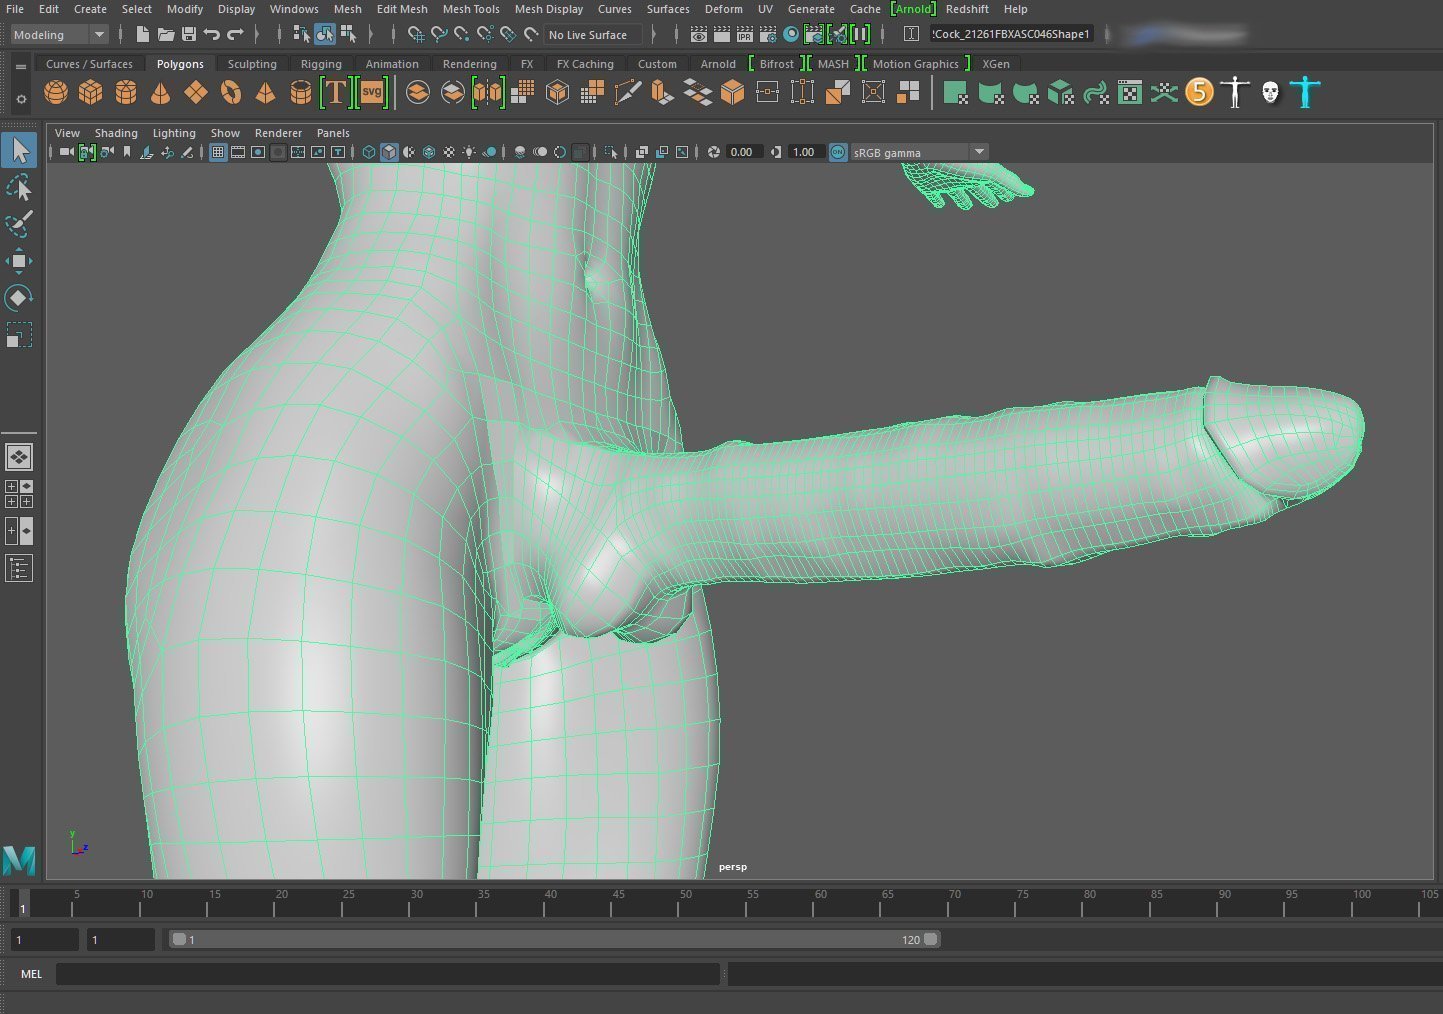
The Maya UI and a screenshot of a WIP of mine
To start with creating a custom 3D asset, we have to actually… create it. That is, we’re going to have to make a mesh, a wireframe shape that we can then later apply textures and rigging to. Given that a dick isn’t the most complicated of shapes (basically just a cylinder), you hardly need to a master modeler’s skillset to make one. Which means that the entry level is low, and the potential for overkill is high. Let’s quickly run through some modeling solutions.
Blender is the go-to software for most small time artists. It’s a fully capable toolkit that has the potential to tackle almost our entire workflow, and it is free! Would I advise against trying Blender out? Of course not. It just has one downside: an atrocious UI. Which may not bother you as much if you don’t know better, but the moment you step into an Autodesk program the difference is night and day.
Ah, yes. Autodesk. Their programs 3DS Max and Maya both have amazing modeling toolkits that will allow you to create anything you desire. The downside? Licenses are expensive, upwards of a thousand dollars a year and probably more depending on your subscription. Maybe a bit much to create just a simple cock, but worth investing in if you have larger ambitions over time. Bloodlust, for example, is made using Maya.
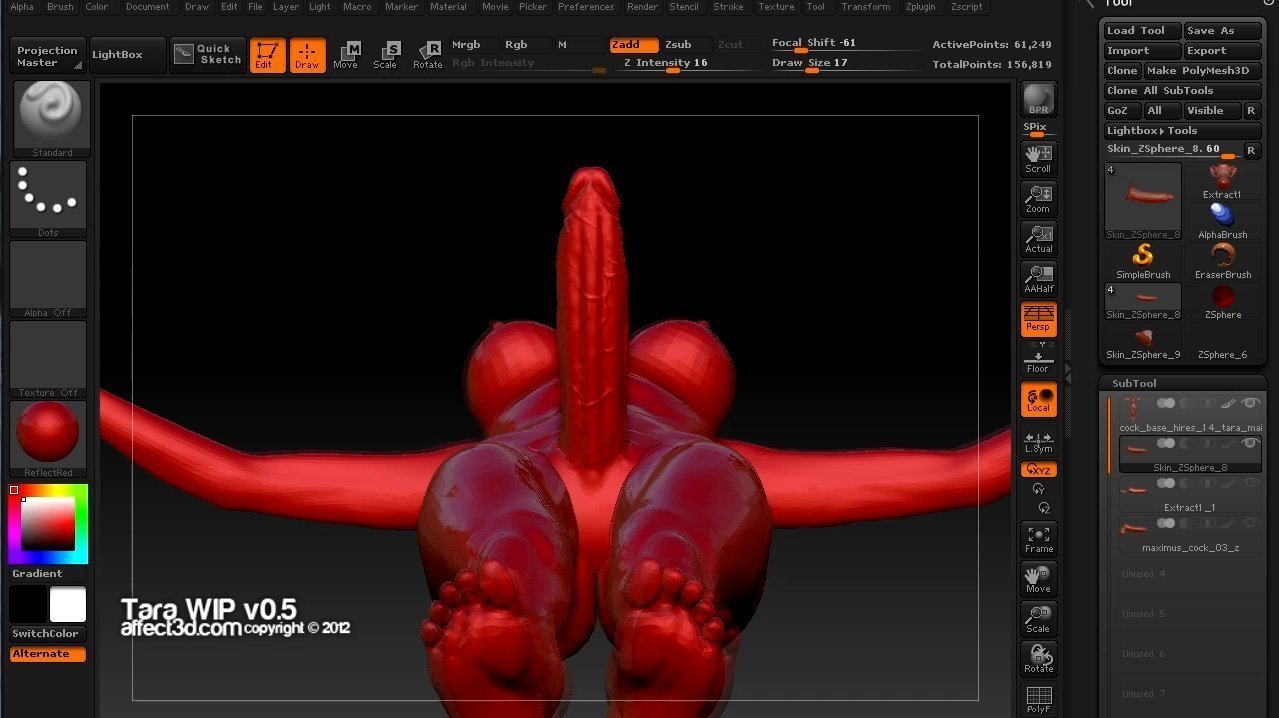
A screenshot from a WIP of Sayako’s cock in an old version of Zbrush
For a more organic approach to modeling, sculpting is the way to go. Now all software mentioned above supports sculpting, but not as dedicated sculpting software. In the previous tutorial we’ve already discussed Sculptris, which is a free solution made available by developer Pixologic. So now we briefly touch on its bigger brother Zbrush, a far more complete and thorough solution than Sculptris. Why? Because other than a complete sculpting toolset, it also allows us to tackle the next step in the process, namely texturing, in a very intuitive manner. The downside again is a rather expensive license, around $800, but that is not nearly as expensive as Autodesk.
Texturing
To texture a mesh you are satisfied with, you will need to generate a UV map, which is an image of your 3D asset spread across a 2D grid, with the U being one axis and the V being another. This is something you can do in all respectable 3D software, but the process isn’t equally organic in all of them.
With Blender, as well as Maya/3DS Max, the process of UV mapping is fairly rigid. You generate a UV map and then apply images containing the appropriate color information to them. It requires sliding the image around, scaling and rotating it, and so forth, until you get a fit that seems natural. It requires compensating for stretching around corners and bends and other places where 2D pictures are not designed to operate.
The other method is polypainting. Zbrush offers a very simple way to do this through its Spotlight tool, where you can import any 2D image of your choosing and paint from it onto the mesh as though it were a brush. You can sample from an image, you can easily paint over stretchy areas to make them look nicer, and so forth. Spotlight is a great way to do create diffuse/base color maps, but to buy a Zbrush license just so you can make use of it may be a bit much.
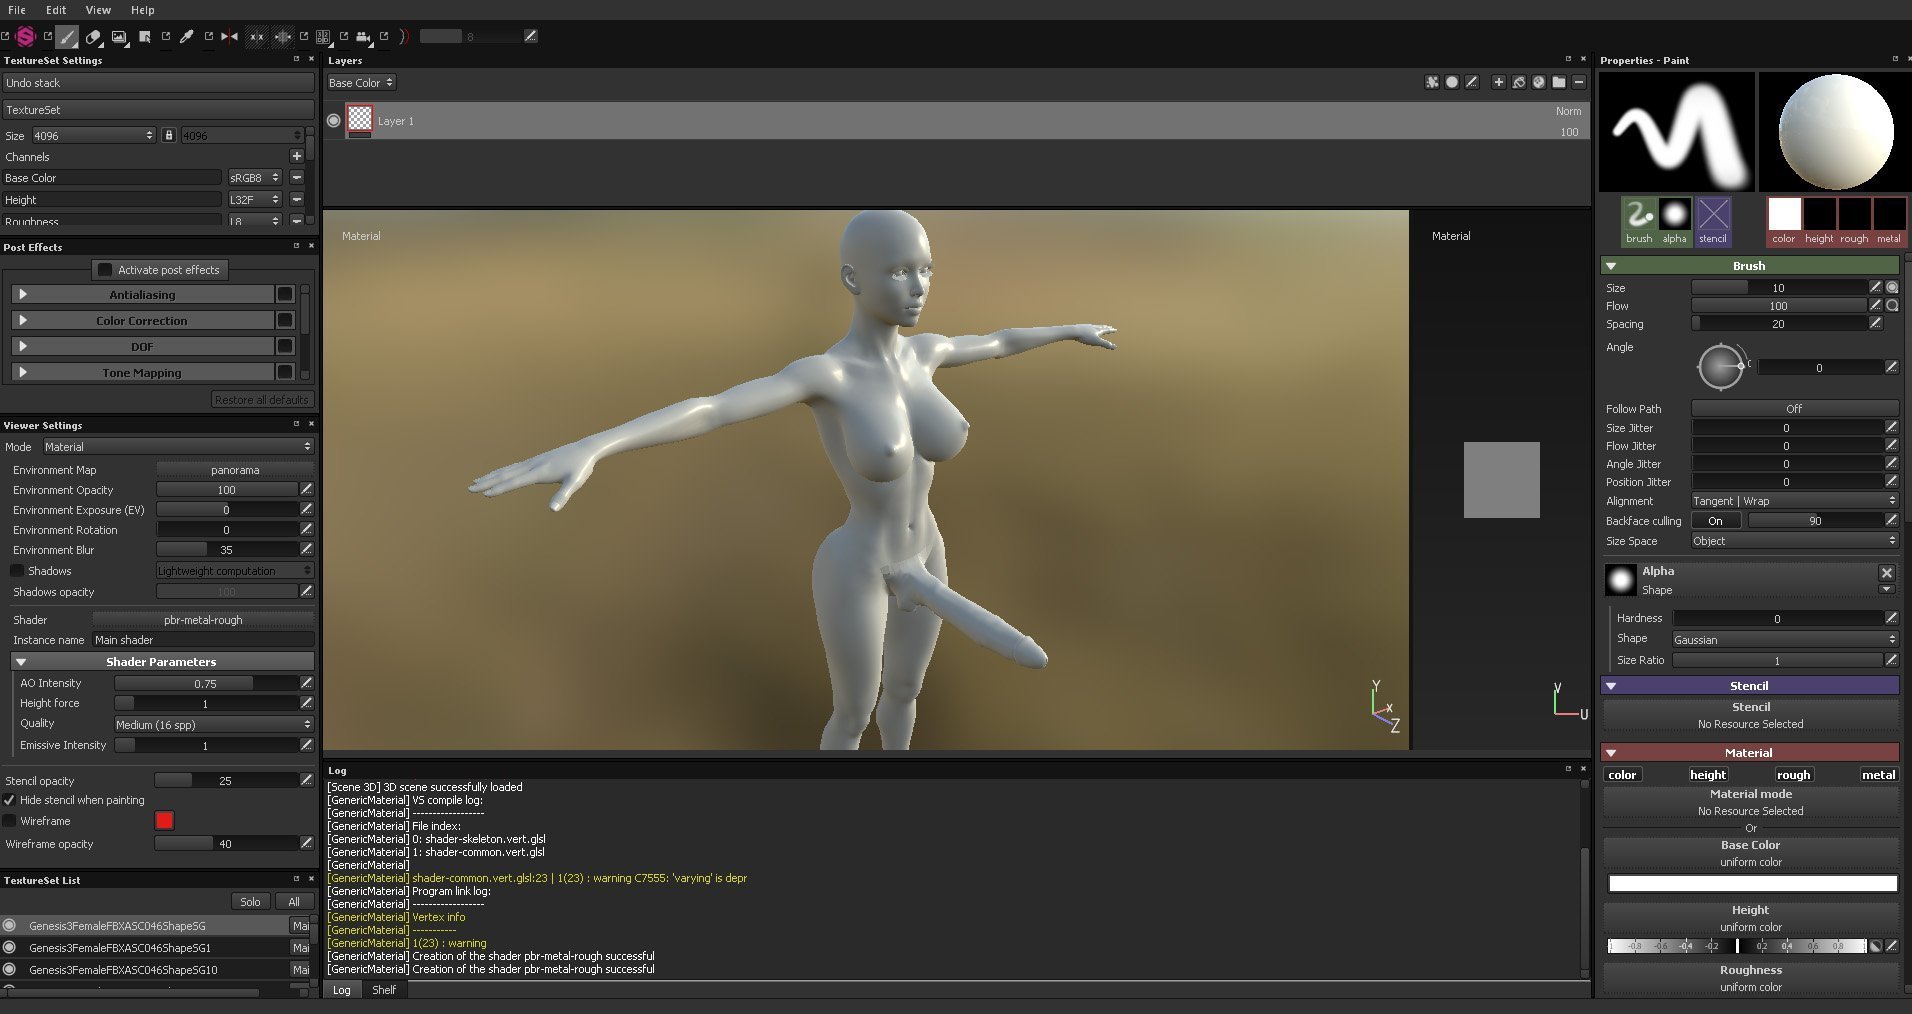 The cheaper way to go is Substance Painter, which you can buy on Steam for under $200. Substance Designer is a step more complicated and expensive, so don’t make the mistake of confusing the two. Substance Painter is dedicated texturing software, meaning that you take any mesh that you created in other software into it so that you can then generate all sorts of maps for it. It works almost exactly like Zbrush’s Spotlight, but then as a dedicated piece of software with a stronger interface.
Rigging
For this step, what we mean is adding an animation skeleton. Rigging a cock isn’t a very complicated process, and in Maya it is as simple as literally drawing the bones yourself and telling geometry to connect with it. To a large degree, Maya will then accurately weight map the mesh to make sure it bends and curves naturally. You don’t want your custom cock to snap like a paper tube when you make it assume poses, after all.
There is another way to rig, though, which is cheaper but also a bit more laborious. Daz Studio itself has a rigging toolkit, so we can export any static 3D mesh into Daz Studio and rig it, then weight/bulge map it manually. On something like a cock this requires about 2 to 3 hours of work once you’ve gotten proficient at it, maybe less if you’re really cracking down. But the first time will be a lot of trial and error. That said, it’s a financially responsible way to get a functional asset going, and Daz itself offers good tutorials on how to get started.
Once your gens prop is rigged, we’ve actually done most of the work already. It has been modelled, then provided with the appropriate texture maps, and then made ready for animation. What comes next?
Implementation and Postwork
To the left is a seamless render. To the right is the original shot with the darkened cock base.
Like all assets, you need to make sure you’ve got your shaders configured right. Nothing looks worse than genitalia with the wrong shaders on them, because then they look as though they don’t belong to the body they’re attached to.
This is mostly an issue, however, if you operate the gens as a separate prop. If you intend to geograft, then shaders will be copied. Unfortunately, geografting is a whole separate step that I’ve not included in this workflow, because it requires a number of things from the artist.
First, that you know how to geograft. Daz has tutorials available for this in their asset store. Second, that you properly prepare your asset for grafting. This means that on the side where it is intended to attach to the body, the faces match the geometry it is intended to attach to. Third, that you have gotten material copy scripts operational, so that the UV maps on your base character blend into the UV maps on your gens asset.
It’s a process I still haven’t mastered myself. All my content has been created with the cock as a separate prop. The downside? It leaves a visible seam around the base where geometry intersects, which is almost unfixable with transparency maps and/or rendering. But if you have access to some image editing software, postwork makes short work of this problem for you.
The idea of postwork is corrective editing. On any complete render, you accept ugly collision seams around the genitalia base. You then take the render into photoshop, paint.net, or any preferred piece of software, and correct the error. The end result is a seamless looking shot. This has drawbacks: certain renders are simply harder to correct than others, so you do need to take pose complexity and camera angle into account to make your life a bit easier.
Next month!
Now that we’ve got custom genitalia creation out of the way, it’s time to look at cameras and cumshots. Let’s do cameras first, so come back for that next month! In the meanwhile, make sure you check out our video tutorial series under the 3DX Artist Resource, for a step by step guide of how to get started with Daz Studio!
nickey
April 19, 2021tutorial cum
LightSpeedBubble
August 9, 2019“It (Blender) just has one downside: an atrocious UI. Which may not bother you as much if you don’t know better, but the moment you step into an Autodesk program the difference is night and day.”
Please try not to use such demeaning words when qualifying user experience from your own perspective or at least make it clear that this is your personal viewpoint instead of phrasing it as factual truth. User experience through an interface is the aspect of a program that is most dependent on past experience, habits and personal taste. The only objective comparative criticism one can give on 2 different UIs is about the minimum number of steps required to produce the same effect.
To be honest, I am biased myself in the other direction but either way, it’s best to put aside our personal frustrations and stay neutral when giving advice to new users.
Best of luck with your work and with dealing with Maya’s UI ( ͡° ◡ु ~ )
robot
August 30, 2017This is nice
robot
August 30, 2017hhh