

Hey guys! Welcome back to our beginner’s 3DX tutorial series, So You Think You Can Make 3DX. Last month we covered base models and asset stores, so by now it’s time to move into Daz Studio itself. We’ll create a girl, and give her a nice pose.
Finding your content
Finding your install path in Daz Studio
If you already started buying some content, then let’s talk about where to install and find it. With your Daz Studio interface before you, open up the Content Library tab. For an ideal beginner’s layout, I recommend referring to our first Video Tutorial released earlier this month, in which we talk about pruning the Studio interface down to its bare essentials.
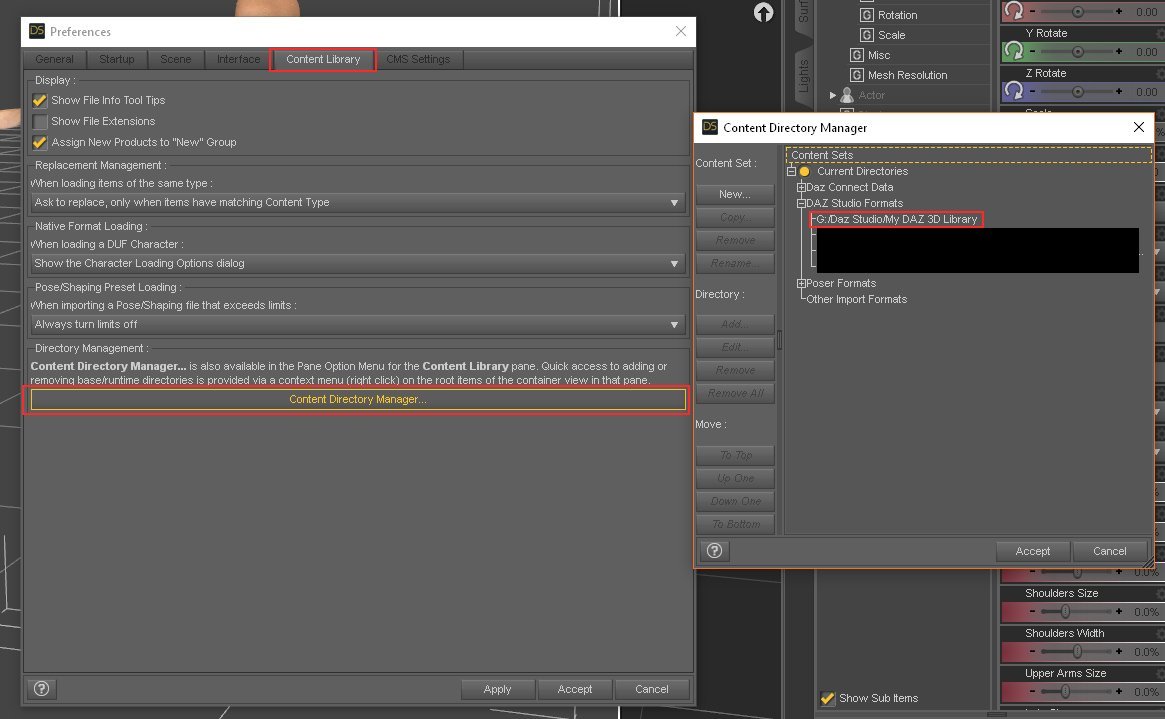
The Content Library displays content according to the folder structure on your hard drive. You can discover the location of the default install directory for content in Daz Studio. Go to Edit > Preferences > Content Library, and then the button way at the bottom called Content Director Manager. The drop-down tree structure shows the location of your “runtime,” as we call it. You can choose to change the location or leave it as is. Just remember where you install content manually when you acquire it from places like Renderosity and Renderotica. Content you buy from the Daz Shop will always make its way to these folders via the install manager, but you can also do everything manually.
For simplicity, I’ll assume that you haven’t installed too much yet. Default with Daz Studio 4.9 is the Genesis 3 Female package. In the Content Library, go to My DAZ 3D Library > People > Genesis 3 Female. Double-click the icon, and load her into the scene.
Morphing your character
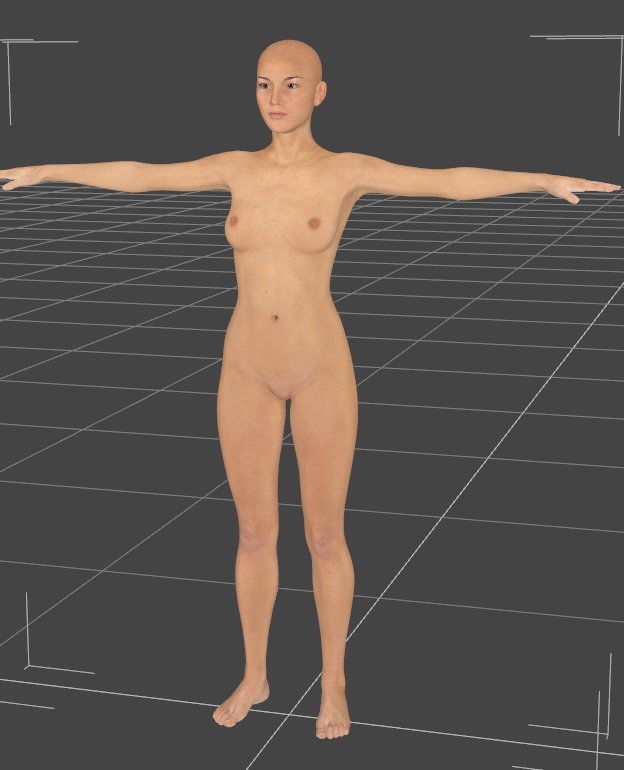
This is Genesis 3 Female. The ladies you see in the top image are also Genesis 3 Female. As you might guess, we have a lot of work to do.
As you might see, the default Genesis 3 Female is hardly an attractive specimen. Her face is flat and uninspiring, her body is undefined. Somehow, she’ll become as pretty as the beauties we encounter all over the Affect3D Store. Where do we begin?
Well, we’ll need more than the basic G3F. But she does come with some prepackaged morphs that allow us to get into sculpting her a bit. A morph is a dial that you can tune in and out, which alters geometry for you. It may give G3F a thinner waist, bigger breasts, a nice round butt and a pair of pouty lips. Of course there are additional morphs, including HD morphs that add more detail to your character, available at the asset stores we discussed last time.
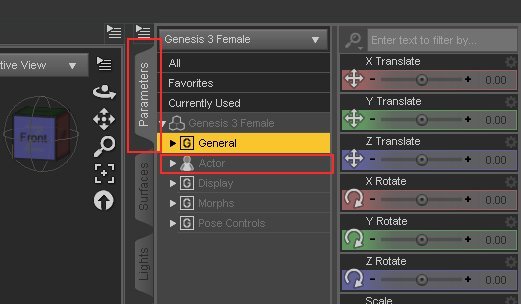
Finding the “Actor” dropdown in the Parameters tab.
Select G3F and open up the Parameters tab. There, double-click “Actor” to open up a list of body areas you can manipulate. Some of them open up into smaller sub-menus. Click any segment, like Chest or Waist, or under Face such things as Cheeks and Jaw, or Brow, and you see the morph sliders appear to the right. Play around with them a bit to get a good look at how they alter your G3F model.
You can expand your options for G3F by buying People, as they are called by Daz 3D. At Renderosity, they’re called Characters. People/Character packages give you new skin textures, new morph dials, and new presets that you can load straight into Studio as ready-to-render ladies.
Now you can pose her
Characters aren’t the only presets you can buy. Another useful tool in the 3DX artist’s arsenal are pre-made pose collections, which you can find in the asset stores we covered last month. These make it very easy to pose a girl, though for the purposes of originality and quality it’s never wise to stick to just the presets you purchase. You should adjust them some after loading them in. I use them to find a good starting pose, and then I build from there.
However, it’s likely that you don’t have any pose sets yet. In that case, you’re going to have to pose manually. That’s more of a time consuming process, especially because there are two ways to do it and it’s best to not mix them up too much. You might also be drawn to the Poses tab, but it’s not necessary. Everything can be done from the Parameters tab. With G3F selected, close down the Actor dropdown menu and open up Pose Controls.

I increased the “smile” slider in this screenshot. For better results, alter brow, eyes, mouth, etc. with their own sliders.
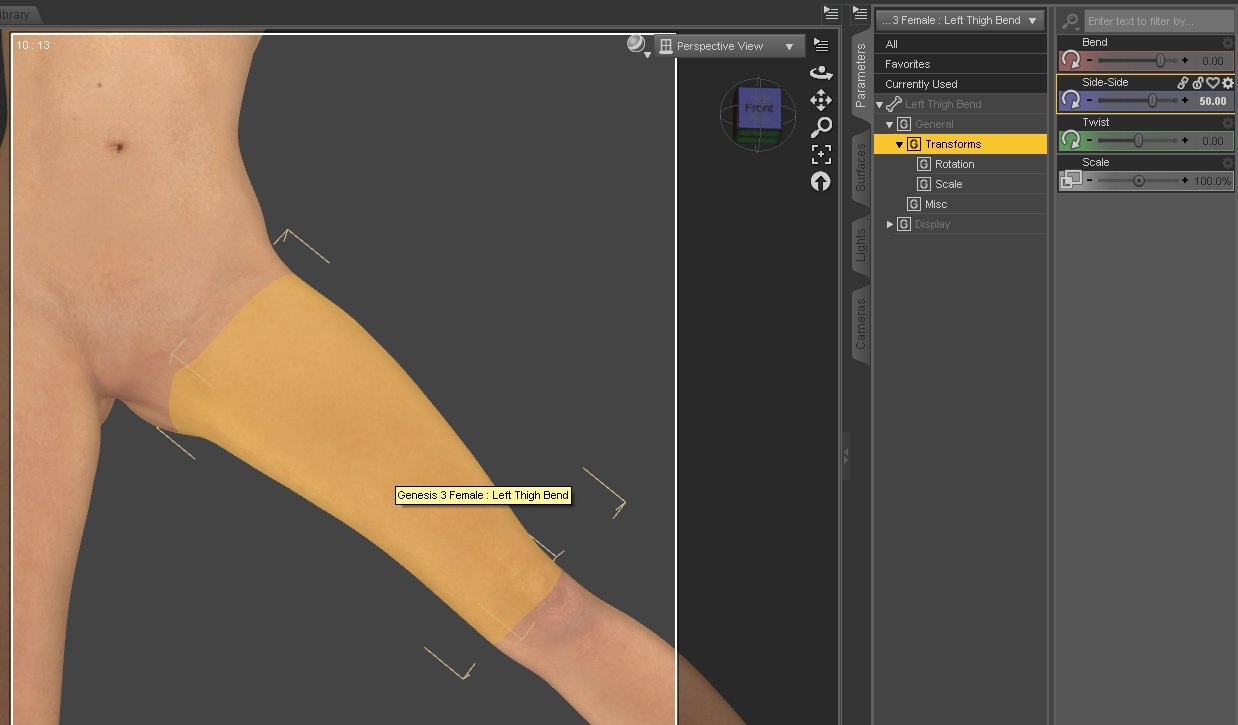
I manually selected a G3F bodypart, and altered its position with the Side-Side slider.
There are two ways to pose a G3F model. One is by manipulating groups of body parts, which you can do under Pose Controls by first selecting a body part and then adjusting the corresponding sliders. For example, you select the palm of a hand, and this gives you access to pose morphs that allow you to clench a fist, make a grasping gesture, spread the fingers, etc. Similar morphs for mouth, eye, and brow controls exist when you select the G3F head.
That’s a good way to pose complex parts of the body where there are many smaller elements that work in conjunction. For less complex parts, such as the thighs or shins, or upper lower abdomen, we come to the other way in which you can pose your girl. Select G3F and then select one of her larger body segments either in the viewport or via the scene tab. Now, with the Parameters tab open, you see there are Bend, Twist, and Side-Side sliders in place of the old rotation sliders. These are good ways to create a rough base outline for a pose.
So far so good
With all the above, you can morph a character you like and create a rudimentary pose for her. Feel free to head into the asset stores to buy a character package that suits your taste, and a pose collection to get you started. You’ll have a good base to work with. Next time on So You Think You Can Make 3DX, we’re going to take a look at taking your posed and morphed girl into a simple Iray render. For now, let me just say this: welcome to making 3DX!
Danny Bright
May 19, 2019Dude, thank you so much for sharing this awesome content.
craftime
September 2, 2016It seems I must spent some money. Hmm… fuck of ^^ I love this project 😀
GumpOtaku
August 30, 2016Just a heads up – the video link is dead.
William
August 30, 2016I Ben doing Daz for a while,, light Wave to. I would like to get into this 3dx….would have a great time and some money to.
jack pinder
August 30, 2016Many thanks for this series. Although I have stumbled about in the medium some it is good to hear the inside line on the how to by someone who successively creates there.